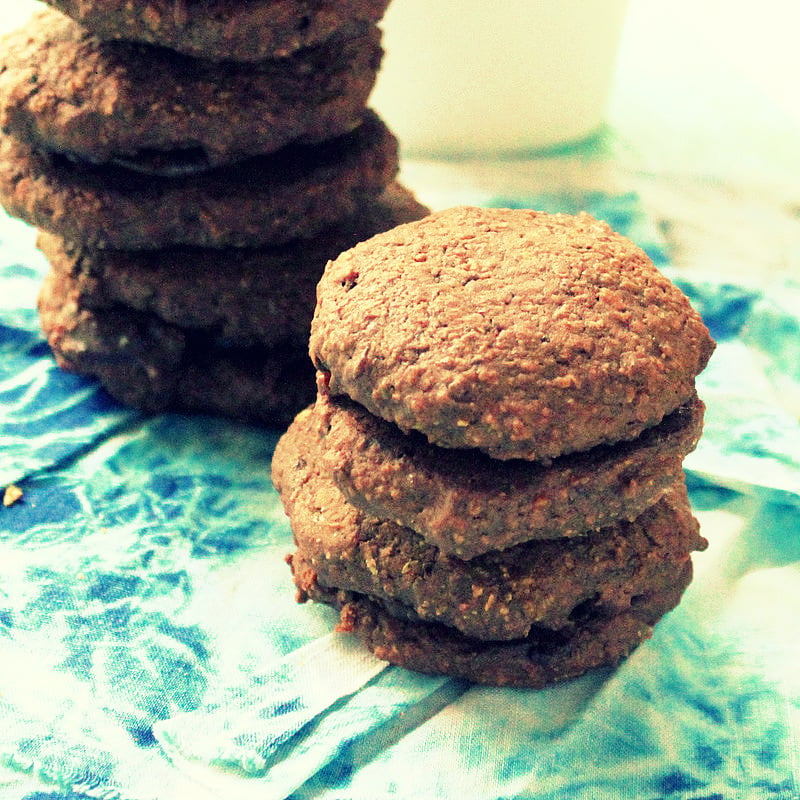
Chocolate Macarons
Printed from nanasfogon.com/recipe/1024561-chocolate-macarons · Original: https://cooking.nytimes.com/recipes/1024561-chocolate-macarons
- Prep
- 15 min
- Cook
- 1620 min
- Total
- 27 hr 15 min
Ingredients
Dairy-free version. Swapped:
heavy cream → full-fat coconut cream or pareve non-dairy whipping cream
Good for vegan, lactose-free and kosher meat meals. Check labels: some plant butters and creamers aren't certified parve or contain nuts or coconut.
- 1 cup plus 2 tablespoons/124 grams confectioners’ sugar About powdered sugar →
- ¾ cup/85 grams superfine blanched almond flour
- ¼ cup/25 grams unsweetened cocoa powder About cocoa powder →
- Lemon wedge (optional), for cleaning bowl About lemon →
- 3 large egg whites (90 grams), at room temperature About eggs →
- ½ teaspoon kosher salt (such as Diamond Crystal) About kosher salt →
- 6 tablespoons/75 grams granulated sugar About granulated sugar →
- 4 ounces bittersweet chocolate, finely chopped About dark chocolate →
- 1 teaspoon vanilla extract About vanilla extract →
- ½ teaspoon espresso powder (optional)
- Pinch of kosher salt (such as Diamond Crystal) About kosher salt →
- ½ cup/120 milliliters heavy cream About heavy cream →
Steps
-
1
Trace your guides and prepare the baking sheets: Using a permanent marker and a bottle cap or a 1 ¼-inch-wide ring cutter, trace 23 evenly spaced circles onto a 13-by-18-inch silicone baking mat or a piece of parchment paper. (Making 3 rows of 5, separated by 2 rows of 4, allows you to stagger the 23 circles.) Repeat with a second piece of parchment or silicone baking mat, then turn both upside down and place each on a flat, rimless baking sheet (or on an upside-down rimmed baking sheet).
-
2
Grind and sift the dry ingredients: In the bowl of a food processor, combine the confectioners’ sugar, almond flour and cocoa powder, and pulse just until the mixture is a uniform color, about 8 pulses. Transfer to a medium-mesh sieve set over a large bowl; shake to sift it through, then discard any lumps.
-
3
Make the meringue: Make sure the bowl of the stand mixer is grease-free. (To clean it, you can rub the inside with the cut side of a lemon wedge.) Then combine the egg whites and salt in the bowl. Using the whisk attachment, beat the whites on medium-low speed until broken up and frothy, about 20 seconds. Increase speed to medium-high, and add the granulated sugar in a slow, steady stream. Continue to beat until the meringue has a slightly matte sheen, starts to gather inside the whisk and forms very stiff peaks, 1 to 2 minutes.
-
4
Macaronage: To the bowl with the meringue, add half of the sifted ingredients and use a large flexible spatula to fold them in, working the mixture vigorously and scraping the bottom and sides thoroughly. Add the remaining sifted ingredients and fold, using the spatula to press the mixture against the side of the bowl and making sure there are no unincorporated pockets of meringue or dry ingredients along the sides or in the bottom. You want to deflate the egg whites to create a fluid — but not liquidy — batter, a process called macaronage.
-
5
Continue to fold until the batter has lost about half its volume, is very smooth and glossy, and falls off the spatula in a steady stream, forming a ribbon that slowly oozes back onto the surface of the batter. Getting the texture right is critical, so try this test: Spoon about a teaspoon of the batter onto a plate — it should ooze slightly but hold a flat dome, and any peak should settle into the surface and disappear within 15 seconds. If it holds a peak, scrape the mixture back into the bowl and fold it a few more times, then repeat the test.
-
6
Pipe the circles: Scrape the batter into a large piping bag fitted with a medium circle pastry tip. Twist the bag to close, then, hovering the bag upright, positioning the tip about ½ inch over the surface of the parchment or baking mat in the center of a circle, apply steady pressure to the bag until the circle is filled. (The batter will continue to spread a bit.) As you lift the piping bag to move on to the next circle, make a rapid, tight circular motion to release the batter. When you have filled the first sheet of circles, firmly tap the baking sheet several times straight down on the towel-lined work surface to pop any large air bubbles, then set the first sheet aside. Pipe the remaining circles on the second sheet, then repeat the tapping motion. Use a toothpick to pop any remaining bubbles beneath the surfaces and fill in any pockmarks left by popped bubbles.
-
7
Let the batter dry slightly: Let the baking sheets sit, uncovered, at room temperature until the surfaces are matte and a thin skin has formed, 45 minutes to 1 hour, though possibly much longer if you’re working in a humid environment. To test if the shells are ready, gently touch the test batter on the plate with your fingertip. If it feels nonsticky and slightly leathery to the touch, and it doesn't indent with light pressure applied, it’s ready.
-
8
Bake and cool the shells: Arrange an oven rack in the center position and heat the oven to 300 degrees. (It's highly recommended that you use an oven thermometer to verify the true internal temperature.) Transfer one of the sheets to the oven and bake on the center rack until the shells are dry on the surfaces, a ruffled foot has formed around the bases and they stay put on the parchment or baking mat when you try to wiggle them, 16 to 22 minutes. (If you’re baking on silicone mats, the shells might take a minute or two longer, since silicone doesn’t conduct heat as well as parchment.) If you’re unsure if they’re done, bake the shells a minute or two longer, as underbaked shells might hollow out and dry shells will rehydrate during the aging process. Let the shells cool completely on the baking sheet, then carefully peel them away. In the meantime, bake and cool the second sheet. Set the shells aside, sorting them into pairs, matching up shells of similar size. If you want to bake the shells in advance, store them at room temperature in an airtight container for up to 2 days.
-
9
Make the ganache filling: Meanwhile, in a medium heatproof bowl, combine the chocolate, vanilla, espresso powder (if using) and salt. In a small saucepan over medium heat, bring the cream to a gentle simmer, then set it aside to cool for about 1 minute. Pour the hot cream over the chocolate mixture and let it sit for several minutes, then whisk gently, starting in the center and working your way outward, until smooth. (If not all of the chocolate has melted, add about 1 inch of water to the saucepan, set it over medium heat, and place the bowl over top. Stir just until all of the chocolate is melted.) Let the ganache sit (off heat), whisking occasionally, until it’s thick and spreadable and holds its shape, 45 minutes to 1 hour. (To speed up this process, you can stir the ganache over an ice bath, but don’t let it get too cold or it will harden.)
-
10
Fill the macarons: Scrape the ganache into a piping bag fitted with a medium round pastry tip and twist the bag to close. Pipe a generous teaspoon of ganache onto the flat sides of half of the cooled shells, then place the remaining shells on top to create little sandwiches, pressing on the shells gently to squeeze the filling to the edges.
-
11
Age the macarons: Chill the macarons briefly to set the ganache (15 to 20 minutes), then pack them into a lidded container, cover, and refrigerate until the shells are softened and yield to the filling, at least 24 hours. Serve chilled. The macarons will keep, covered and refrigerated, up to 1 week.
Flavor map
How Nana pairs flavors →This one is pleasantly bitter, sweet and rich.
Goes well with
 After
Basic Fresh Pasta Dough
69% flavor match
A light meal leaves room for something rich; macarons suits an Italian meal.
 After
Fastest Pasta With Spinach Sauce
69% flavor match
Macarons suits an Italian meal; a light meal leaves room for something rich.
 Pour
Baklava Pistachio Lassi
68% flavor match
Maple syrup with blanched almond flour is a natural match.
 Pour
French Afternoon - Le Goûter Old Fashioned
66% flavor match
They share chocolate; cocoa with chocolate is a natural match.
Log in to tell Nana which pairings are good. Your votes improve the map.
More about this recipe
Nutrition
1 of 23 servings · about 31 g Whole recipe · about 717 g · High confidence
| % DV* | ||
|---|---|---|
| Total Fat | 6 g | 8% |
| Saturated Fat | 2.3 g | 12% |
| Trans Fat | 0.065 g | |
| Cholesterol | 6 mg | 2% |
| Sodium | 80 mg | 3% |
| Total Carbohydrate | 8.1 g | 3% |
| Dietary Fiber | 1.1 g | 4% |
| Total Sugars | 6.4 g | |
| Protein | 2.8 g | 6% |
| Vitamin D | 0.083 mcg | 0% |
| Calcium | 18 mg | 1% |
| Iron | 0.46 mg | 3% |
| Potassium | 89 mg | 2% |
* % Daily Value is based on a 2,000-calorie diet.
- Carbs 33%
- Fat 55%
- Protein 12%
Vitamins & minerals
| Vitamin A | 21.4 mcg | 2% |
|---|---|---|
| Vitamin C | 0.031 mg | 0% |
| Vitamin D | 0.083 mcg | 0% |
| Vitamin E | 1.2 mg | 8% |
| Vitamin K | 0.47 mcg | 0% |
| Thiamin (B1) | 0.014 mg | 1% |
| Riboflavin (B2) | 0.1 mg | 8% |
| Niacin (B3) | 0.23 mg | 1% |
| Pantothenic acid (B5) | 0.071 mg | 1% |
| Vitamin B6 | 0.011 mg | 1% |
| Folate | 3.9 mcg DFE | 1% |
| Vitamin B12 | 0.019 mcg | 1% |
| Choline | 5 mg | 1% |
| Calcium | 18 mg | 1% |
| Iron | 0.46 mg | 3% |
| Potassium | 89 mg | 2% |
| Magnesium | 25 mg | 6% |
| Phosphorus | 41 mg | 3% |
| Zinc | 0.3 mg | 3% |
| Copper | 0.12 mg | 14% |
| Manganese | 0.17 mg | 7% |
| Selenium | 3 mcg | 5% |
Fats & carbs in detail
| Monounsaturated fat | 2.6 g | |
|---|---|---|
| Polyunsaturated fat | 0.72 g | |
| Omega-3 | 0.011 g | 1% |
| Omega-6 | 0.68 g | 4% |
| Starch | 0.047 g | |
| Net carbs | 7 g | |
| Omega-6 : Omega-3 ratio | 61.8 : 1 |
Amino acids (protein building blocks)
| Histidine | 0.073 g | |
|---|---|---|
| Isoleucine | 0.13 g | |
| Leucine | 0.23 g | |
| Lysine | 0.15 g | |
| Methionine | 0.063 g | |
| Cystine | 0.053 g | |
| Phenylalanine | 0.16 g | |
| Tyrosine | 0.1 g | |
| Threonine | 0.11 g | |
| Tryptophan | 0.033 g | |
| Valine | 0.17 g |
How we calculated this
| Ingredient | Counted as | g | kcal |
|---|---|---|---|
| 1 cup plus 2 tablespoons/124 grams confectioners’ sugar | Not counted — incomplete line | ||
| ¾ cup/85 grams superfine blanched almond flour | Nuts, almonds, blanched | 109 | 644 |
| ¼ cup/25 grams unsweetened cocoa powder | Cocoa, dry powder, unsweetened | 22 | 49 |
| Lemon wedge (optional), for cleaning bowl | Not counted — kitchen equipment | ||
| 3 large egg whites (90 grams), at room temperature | Egg, white, raw, fresh | 270 | 140 |
| ½ teaspoon kosher salt (such as Diamond Crystal) | Salt, table | 3 | 0 |
| 6 tablespoons/75 grams granulated sugar | Sugars, granulated | 75 | 290 |
| 4 ounces bittersweet chocolate, finely chopped | Candies, semisweet chocolate | 113 | 544 |
| 1 teaspoon vanilla extract | Vanilla extract | 4 | 12 |
| ½ teaspoon espresso powder (optional) | Beverages, coffee, instant, regular, powder | 0 | 2 |
| Pinch of kosher salt (such as Diamond Crystal) | Salt, table | 0 | 0 |
| ½ cup/120 milliliters heavy cream | Cream, fluid, heavy whipping | 120 | 408 |
Matched to the USDA FoodData Central database (SR Legacy). Amounts are converted with USDA portion weights where they exist, otherwise typical sizes. Open in the analyzer to adjust a match →
Estimated from the ingredient list — brands, exact sizes and cooking losses vary. Not medical advice.
Allergens
-
Tree nuts › Almond
In: ¾ cup/85 grams superfine blanched almond flour
Almonds, cashews, walnuts, pecans, pistachios, hazelnuts and other nuts that grow on trees. Peanuts are a legume and listed separately.
-
Cocoa & chocolate
In: ¼ cup/25 grams unsweetened cocoa powder; 4 ounces bittersweet chocolate, finely chopped
-
Coffee
In: ½ teaspoon espresso powder (optional)
-
Egg
In: 3 large egg whites (90 grams), at room temperature
Whole eggs, yolks, whites and egg-based sauces like mayonnaise, aioli and hollandaise.
-
Citrus › Lemon & lime
In: Lemon wedge (optional), for cleaning bowl
-
Milk / dairy
In: ½ cup/120 milliliters heavy cream
Cow's milk and anything made from it: butter, cream, cheese, yogurt, whey, casein, ghee.
-
Vanilla
In: 1 teaspoon vanilla extract
Found by reading the ingredient names. Brands and "may contain" warnings vary, so always check the label.
Questions about this recipe
- Can I make these macarons ahead of time?
- Yes, you can prepare the shells and ganache in advance, but it is best to assemble and fill them shortly before serving to maintain the ideal texture.
- How should I store or freeze the finished macarons?
- Store them in an airtight container in the refrigerator; they also freeze well for up to a month if sealed tightly to prevent odors from absorbing.
- What can I use if I don't have almond flour?
- You can make a substitute by pulsing raw blanched almonds in a food processor until they reach a fine, sandy consistency, being careful not to overprocess them into almond butter.
- How do I know when the shells are actually done baking?
- The shells are done when they have a ruffled 'foot' at the base and no longer wiggle or slide on the baking mat when gently touched.
- What is the best way to serve these?
- These are excellent served as a plated dessert with fresh raspberries or a drizzle of raspberry coulis to balance the rich chocolate flavors.
My notes
Log in to keep private notes on recipes.
Learn while you cook
Learn library →- Techniques · 5 min read Creaming & Folding Cream cool-room-temperature butter (65°F) with sugar for 3–5 minutes until pale and fluffy to build air; fold gently in…
- Grilling & Barbecue · 5 min read Doneness & Thermometers Time, colour and touch lie; a thermometer doesn't. Buy a fast digital instant-read, insert it into the thickest part, p…
- Ingredient Deep-Dives · 8 min read Chocolate & Cocoa Bake with 60–70% bars, keep chips for cookies, match the cocoa to the leavener, and melt it low and dry.
Words in this recipe
- Meringue
- Egg whites beaten with sugar into a glossy foam. French is uncooked; Swiss is warmed over water; Italian is made with hot syrup.
- Stiff peaks
- Whipped cream or egg whites that hold a straight, upright peak when the whisk is lifted. Beyond this, they turn grainy.
- Fold
- To combine a light, airy mixture (whipped cream, egg whites) into a heavier one with gentle cutting and turning strokes, keeping as much air as possible. Learn more
- Ganache
- Chocolate melted into hot cream, used as glaze, filling or (whipped) frosting. More cream makes it softer. Learn more
Handy for this recipe Measurements & ConversionsSubstitution Finder